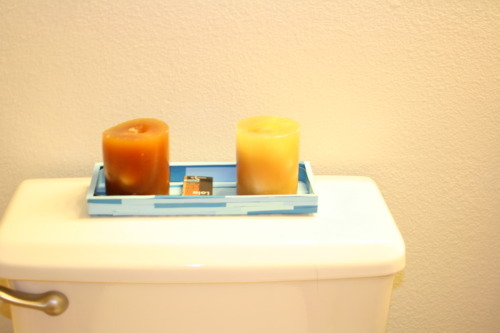
So, this is what I came up with. The best part is that it cost me NOTHING!!
It was $free.99!!
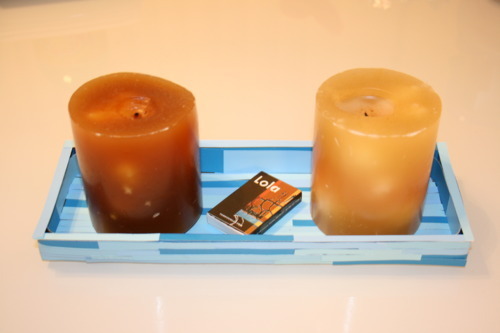
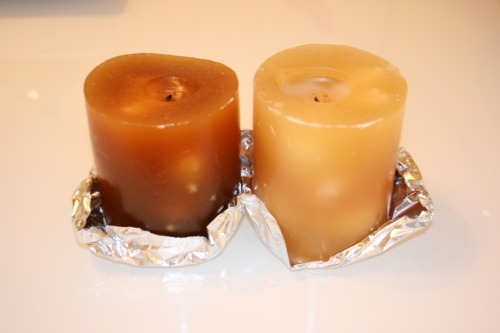
This was now going to replace the aluminum pseudo-tray I made back in December when we first moved in.
I made the new tray following my hubby's suggestions which were:
- Long and low sleek looking box shape
- Maybe covered with aluminum foil and painted
- Most importantly, long, low and sleek :)
- Cardboard box ( I had one from Costco from Sunday shopping)
- Free paint chips from Home Depot (I got the idea from other blogs and stocked up some of these paint chips)
- A type of glue (I used spray glue I had at home)
- Paper cutter (optional)
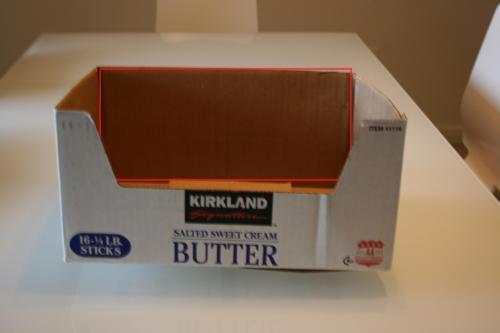
I decided that I was going to only use one of the sides of the box (indicated by the red rectangular box in the picture)
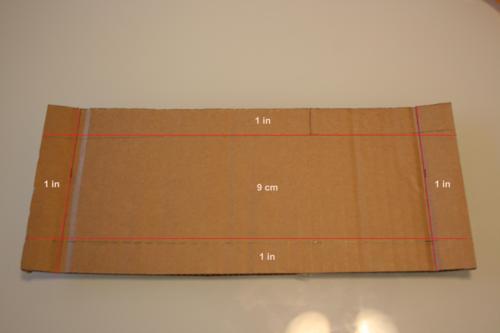
I cut that piece into the following measurement. My candles measured around 7 cm in diameter, so I decided to give it 9cm, and in compliance to my Hubbybunches' request of making it low and sleek, I made the sides only 1 in tall.
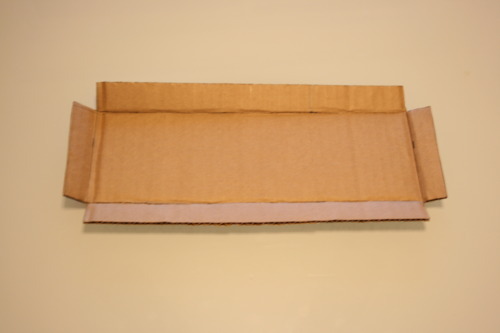
After cutting the overlapping edges, it look something like this. I hot glued the edges of the box to make it look like a tray. (I know it is really ghetto to hot glue everything, but I have utter love for hot glue and its versatility, it's my confession of the day)
Note: I used some painters' tape to hold the edges of my box together, but if your box looks resistant, then this step is not necessary.
Step No.2: Experiment, Fail, and Paint Chip your way to success
Taking my Hubbybunches' advice, I wrapped the entire tray with aluminum foil and then spray painted it. It looked not as sleek as I knew he would probably expect :(
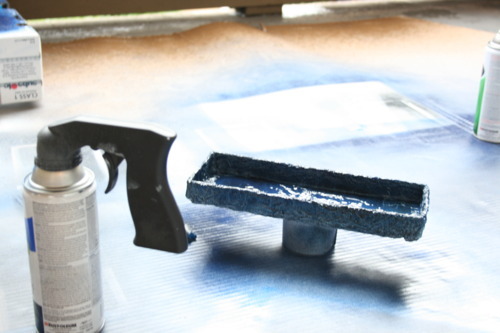
So, I went looking for resources around the house and I had some paint chips I had collected for another craft project I am still working on. So I decided I was going to use the paint chips.

At first, i was going to cut them into half inch cubes and tile them, but I felt that this would make the box look very small and too boxy (if that makes any sense), I wanted to emphasize the long and sleek nature of the candle tray, so I opted for horizontal strips of paint chips, which corresponds to my objective.
After lots of patience and spray glue in my hand, the final product looked very nice.
Step 3: Enjoy your CRAFTACULAR accomplishment :)

Some post thoughts: I probably should apply couple layers of Polycrylic Protective Finish so it will be protected from the moisture in the bathroom caused by my love for really hot showers.
No comments:
Post a Comment